This article is about how to install profile for your camera to unlock CLiR Raw Workflow.
One of the key point of CLiR workflow: you can edit an infrared image, while accessing all Raw parameters in Lightroom or Camera Raw via Photoshop.
In CLiR release v1.2 we’ve included over 400 dcp profiles that should cover most of brands and models for infrared.
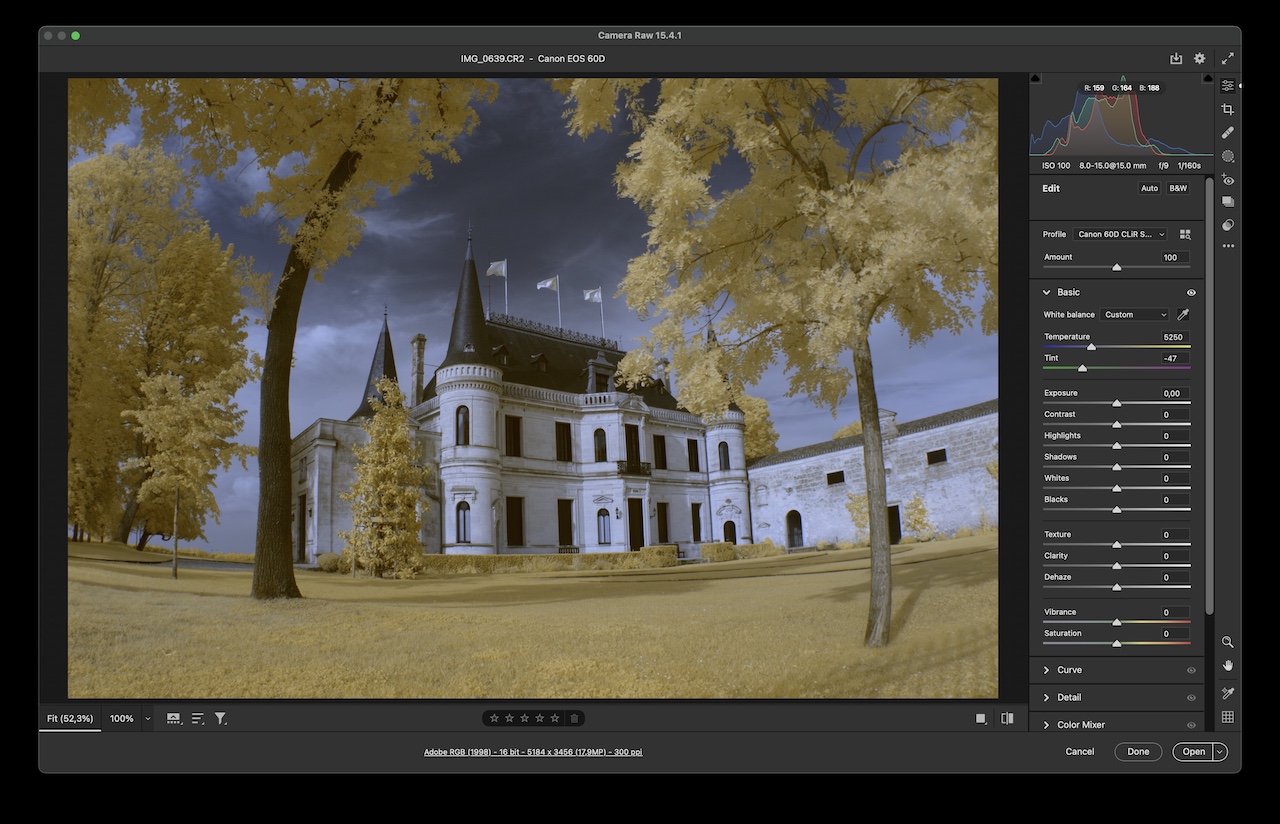
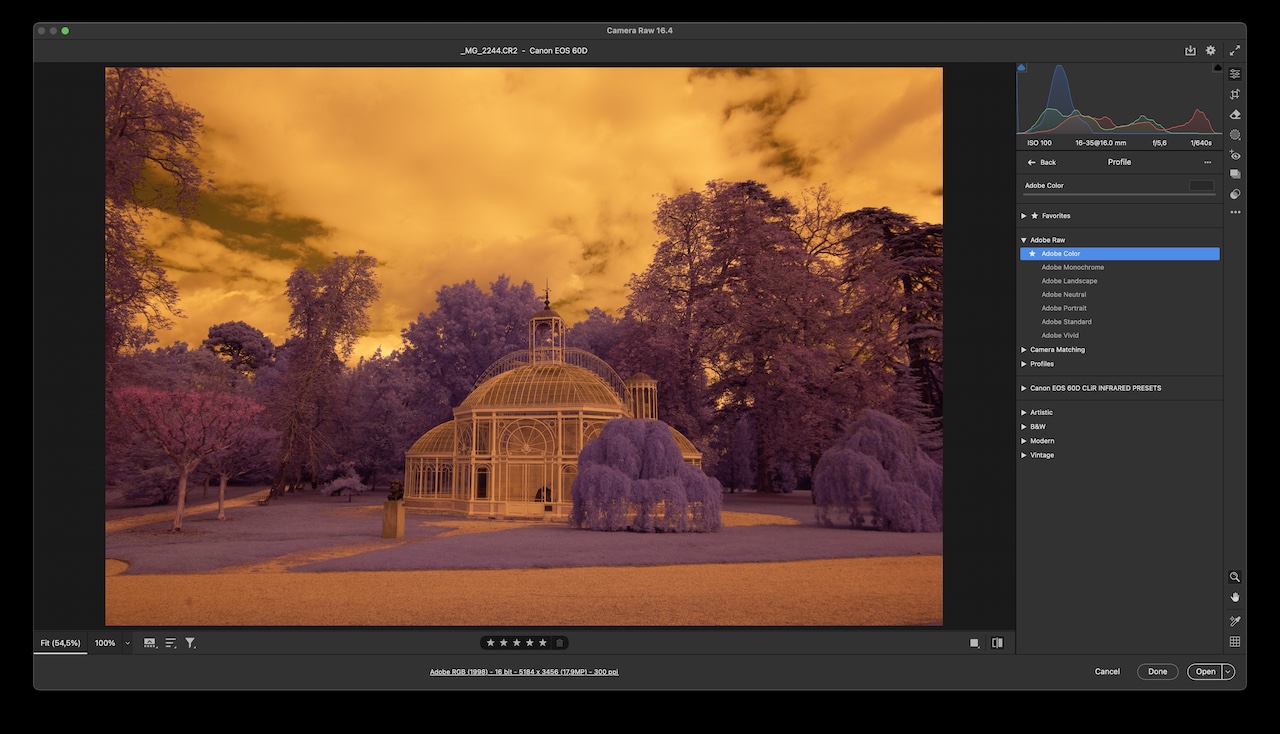
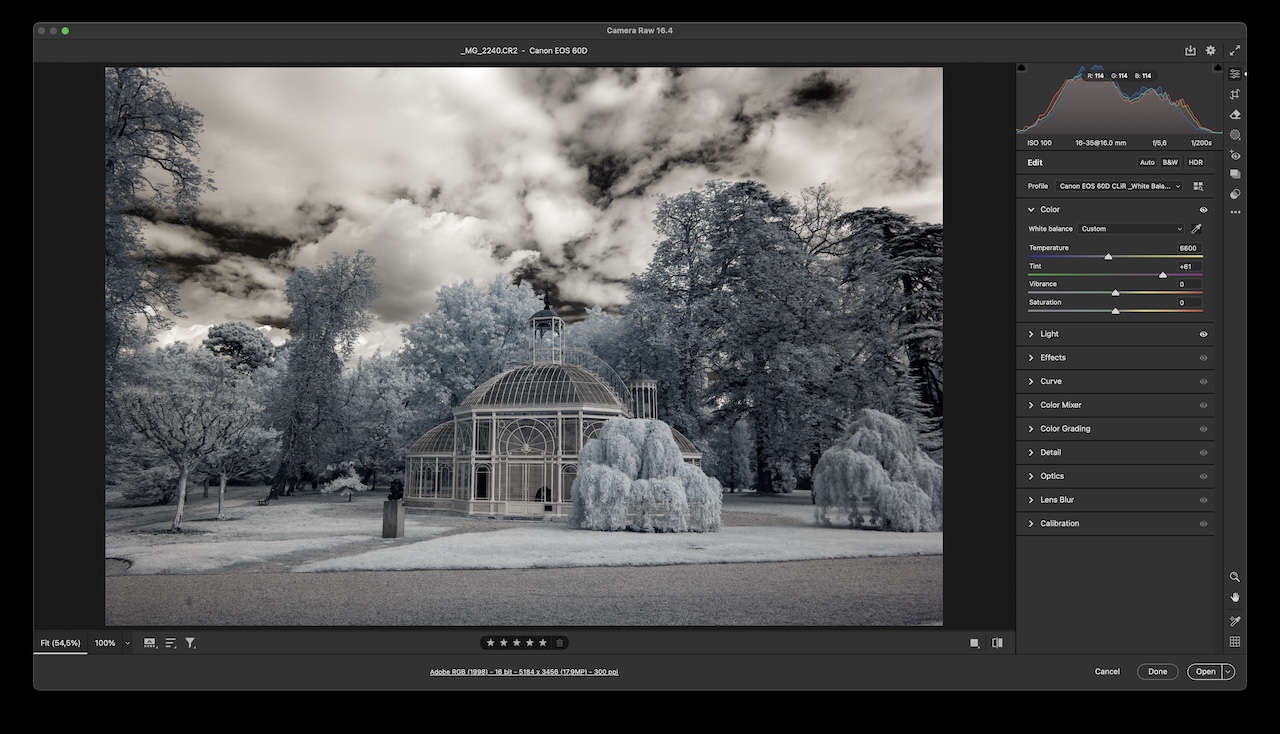
Below shows dramatic diffrence when using proper CLiR infrared dcp profile.
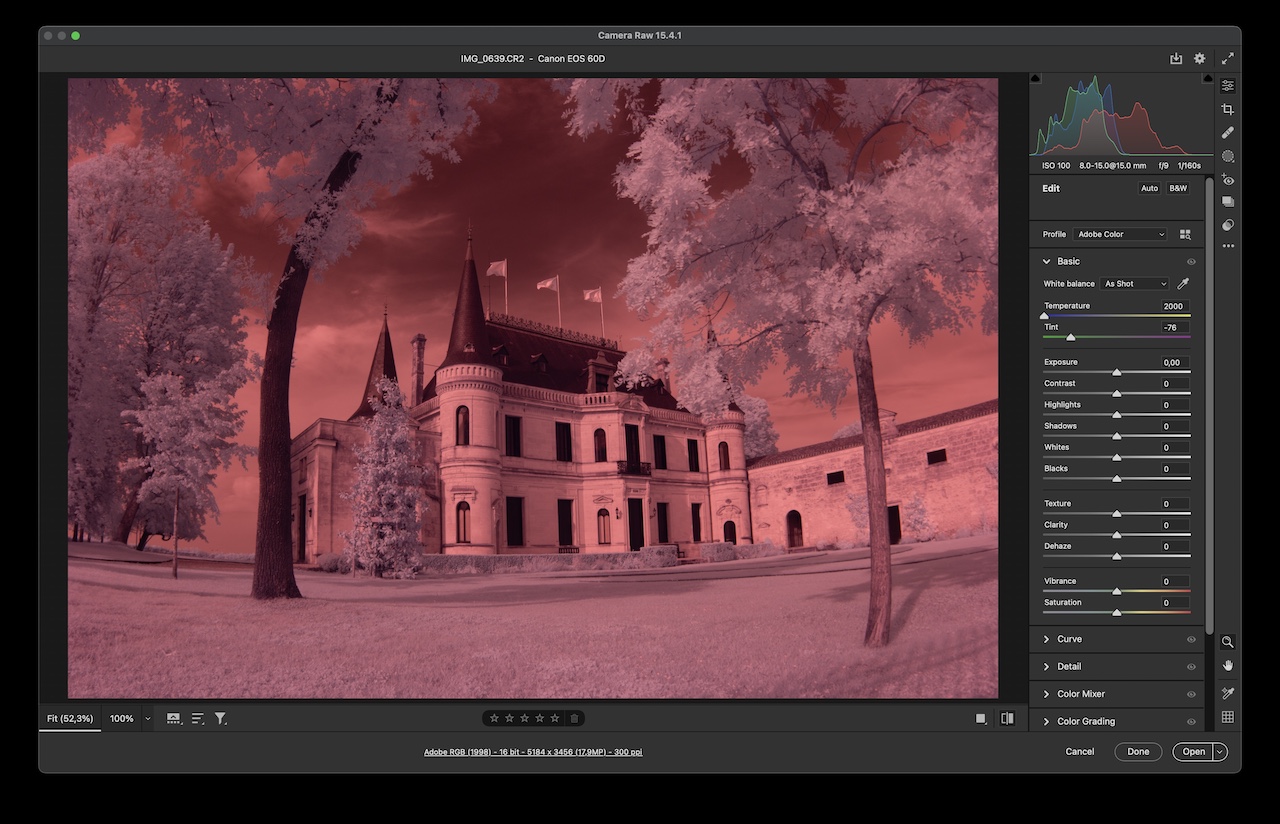
Wait ! Let’s adjust Raw White Balance using Temp and Tint sliders…

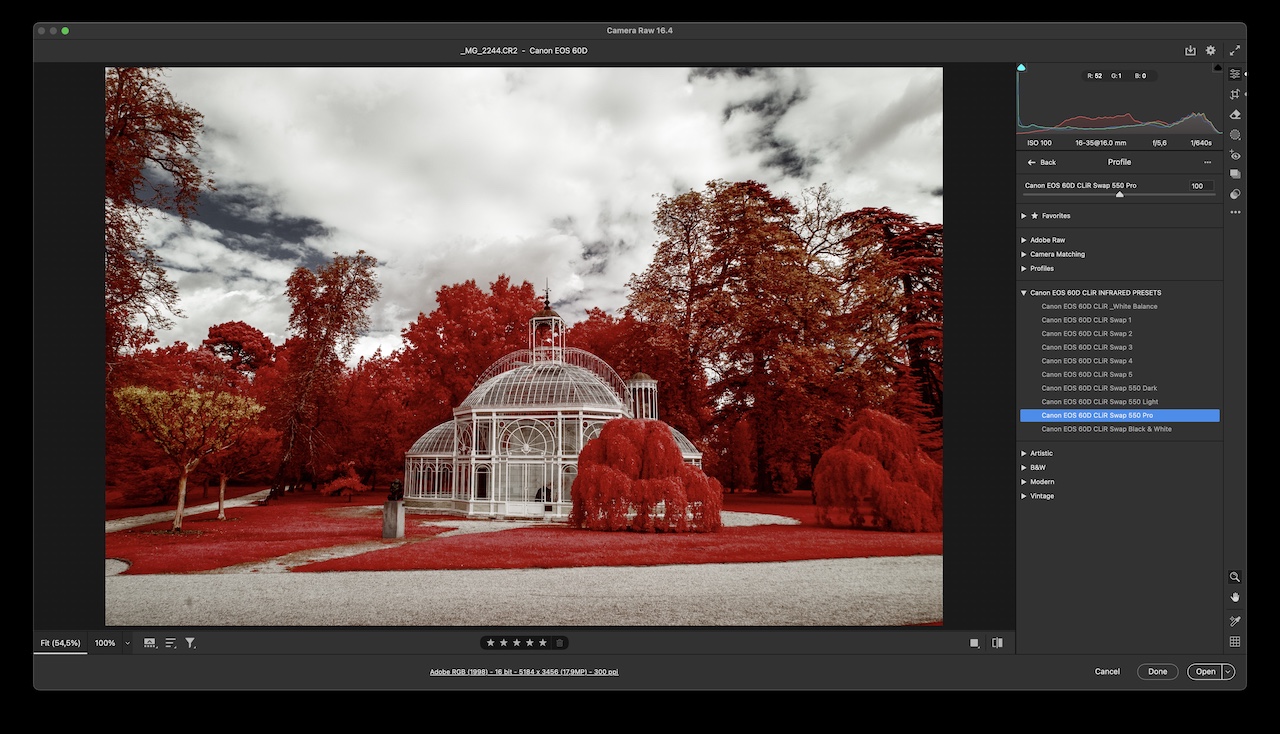
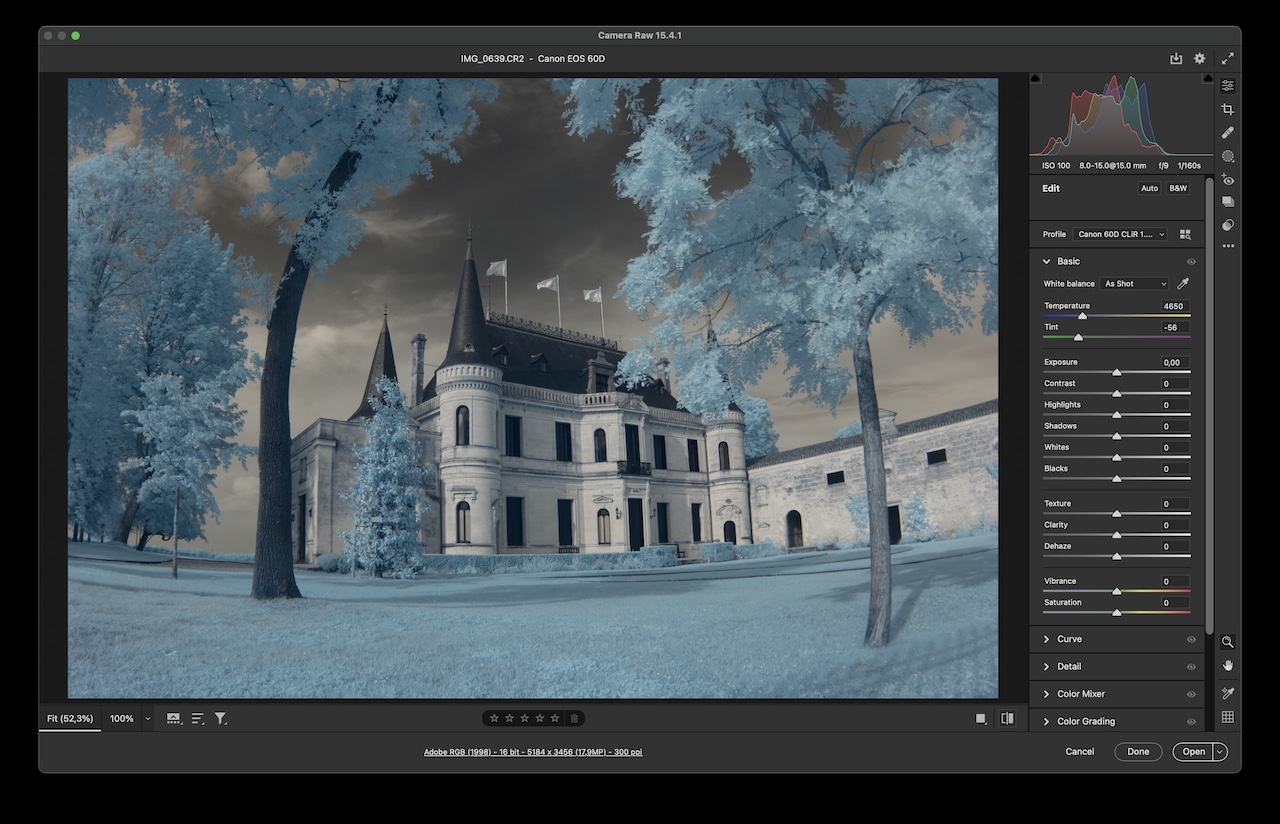
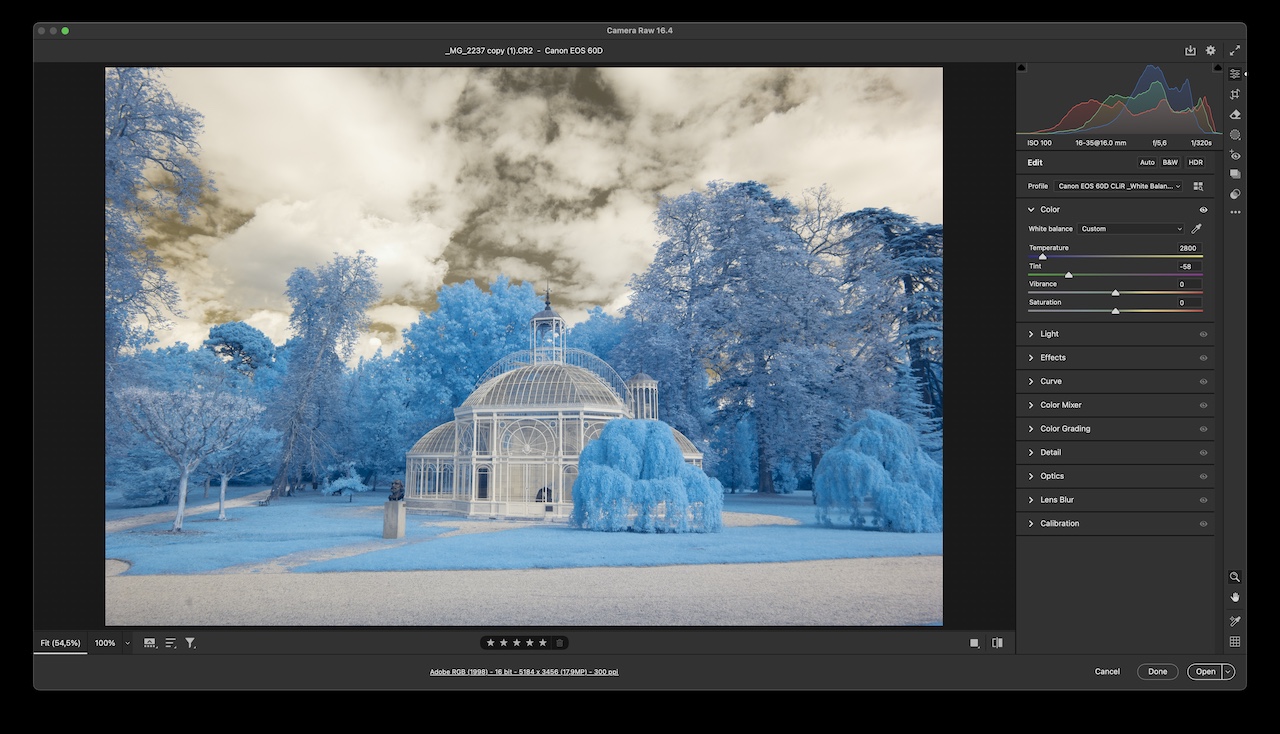
Woohoo! Pretty good !!! Here’s more…

Why do I have to use an Infrared custom profile?
CLiR Infrared profiles fills the gap between Raw editing and White Balance, when using Adobe Camera RAW, Photoshop or Lightroom. By now we’re quite sure that you’ve realized that digital infrared photography is very special. Therefore, it needs special attention when it comes to White Balance. While shooting, and while developing your images.
CLiR workflow will let you enjoy digital photography processing on Raw files, which is a true game changer. For that matter, and because we need to set our infrared camera to White Balance settings out of the ordinary, CLiR is the ideal solution that tells Camera Raw that we are willing to go beyond the 2000K limit of a RAW file rendered by Adobe’s engine.
Introducing CLiR Infrared Normalization :
CLiR Infrared dcp profile is setting Adobe DNG / RAW engine to interpret of White Balance properly.
Infrared Normalization bridges the gap between editing RAW Infrared images and decoding White Balance inside of Lightroom or Adobe Camera RAW.

Frequently Asked Questions
I have many filters for my camera. How many profiles do I need ?
You only need to install one profile per camera, even if you own multiple filters.
A “dcp” profile, also known as “camera-centric”, is specific to a particular camera model and brand because it is created using the unique color data captured by that camera’s sensor. It cannot be duplicated or used for another camera model, even if they are from the same brand. For example, renaming a file from “Canon 5D Mark II” to “Canon 5D Mark III” won’t work for the latter. A dcp profile must be constructed using a RAW file from the camera for which it is intended.
The list of dcp profiles supplied with CLiR 1.2 Mastery Course
When to use CLiR Infrared Profiles?
Use CLiR Infrared custom dcp profiles when shooting with the following filters:
- Dual Pass (blue glass, “Super Blue”, blocks Visible Light, pass UV and iR)
- 550nm (orange)
- 590nm (deep orange)
- 665nm (red)
- 720nm (deep red)
- 820nm and above (black)
Note 1: LifePixel “Hyper Color” (470nm), and Kolari iRChrome (blue glass filter) do not need Infrared custom dcp profiles for editing. These two are the only exceptions.
Note 2: When editing RAW with infrared dcp profile for better White Balance rendering, it is now up to you to adjust and optimize the Temperature + Tint sliders to get maximum color separation and diversity, and reduce color cast.
TIP: When shooting with Kolari “IR Chrome” filter, I’d advise you to set your camera internal Custom White Balance (CWB) to 10,000K. That’s a nice start to enjoy this filter.
My camera is not listed. What shall I do?
If you cannot find your camera’s brand and model in the CLiR Infrared dcp Profile Library…
How do I install a “dcp” profile for my camera on my computer?
⚠️ If any Adobe applications are running, please quit these before the profile installation process.
What you’d need:
1 – a “dcp” profile file (supplied in CLiR Mastery Course)
2 – destination folder (where the “dcp” will be pasted)
1 – Explore the CLiR profile library, find your “dcp” profile
- Open folder “CLiR_IR_Mastery_Modules_1-4“
- Open “Module 2 – Intro to iR“
- Open “The Extras“
- Open “CLiR CUSTOM DNG CAMERA PROFILES“
- According to your camera brand & model, locate the dcp file you need.
TIPS: if you’re not sure about your camera’s model : select a Raw file, right-click on it to show information. Look for the EXIF “Brand” property. - Select & Copy the “dcp” file ( [Ctrl. C] for PC or [Cmd. C] for Mac )
In my case I choose the dcp for Canon 60D.

Awesome! Now that you have located your “dcp”file, lets move one to step 2 to access where you will paste it.
2 – Finding your destination folder
TIPS: you can copy the following locations to avoid any spelling mistake…
- Camera profiles location on Windows
myusername > AppData > Roaming > Adobe > CameraRaw > CameraProfiles
- Camera profiles location on Mac
~/Library/Application Support/Adobe/CameraRaw/CameraProfiles
⚠️ Mac users ! The “tilde” wavy line at the beginning of the address is crucial. Don’t forget it!
2 – How to go to CameraProfiles folder ?
PC Windows users
➊ Type %AppData% into the address bar

➋ Click “Open“, you will be in this location:
myusername > AppData > Roaming➌ Navigate to:
Roaming > Adobe > CameraRaw > CameraProfilesmyusername > AppData > Roaming > Adobe > CameraRaw > CameraProfilesExample in my case:
Pierre > AppData > Roaming > Adobe > CameraRaw > CameraProfiles
or
C:Users/Pierre/AppData/Roaming/Adobe/CameraRaw/Camera Profiles
➍ Paste your “dcp” file
myusername > AppData > Roaming > Adobe > CameraRaw > CameraProfiles
✅ Done ! 👍
Mac OS users
➊ In the Finder, press Shift + Command + G
or use the menu Go > Go to Folder…

➋ Copy the address below :
~/Library/Application Support/Adobe/CameraRaw/CameraProfiles➌ Paste the address and click “Go”

➍ The Finder brings you to the correct location :
~/Library/Application Support/Adobe/CameraRaw/CameraProfiles
➎ Paste your “dcp” file in here

✅ Done ! 👍
Conclusion
Camera profiles location on PC:
myusername > AppData > Roaming > Adobe > CameraRaw > CameraProfiles
Camera profiles location on Mac:
~/Library/Application Support/Adobe/CameraRaw/CameraProfiles
⚠️ Mac OS users !
Tilde sign “~” is IMPORTANT. It has to be in there, otherwise you’ll end up in the wrong folder.
❌ /Library/Application Support/Adobe/CameraRaw/CameraProfiles
👍 ~/Library/Application Support/Adobe/CameraRaw/CameraProfiles
How to check “dcp” files installation?
To check that your profile has been successfully installed, open a Raw file from the camera that you’ve just installed the profile for.
You can open a Raw file in Lightroom or Camera Raw via Photoshop, or even Adobe Bridge.
Here, I will open a Canon 60D infrared image. I’ve installed the “dcp” profile for the 60D as described above. Note that if I open a Canon 7D instead, profile for 60D won’t show up…
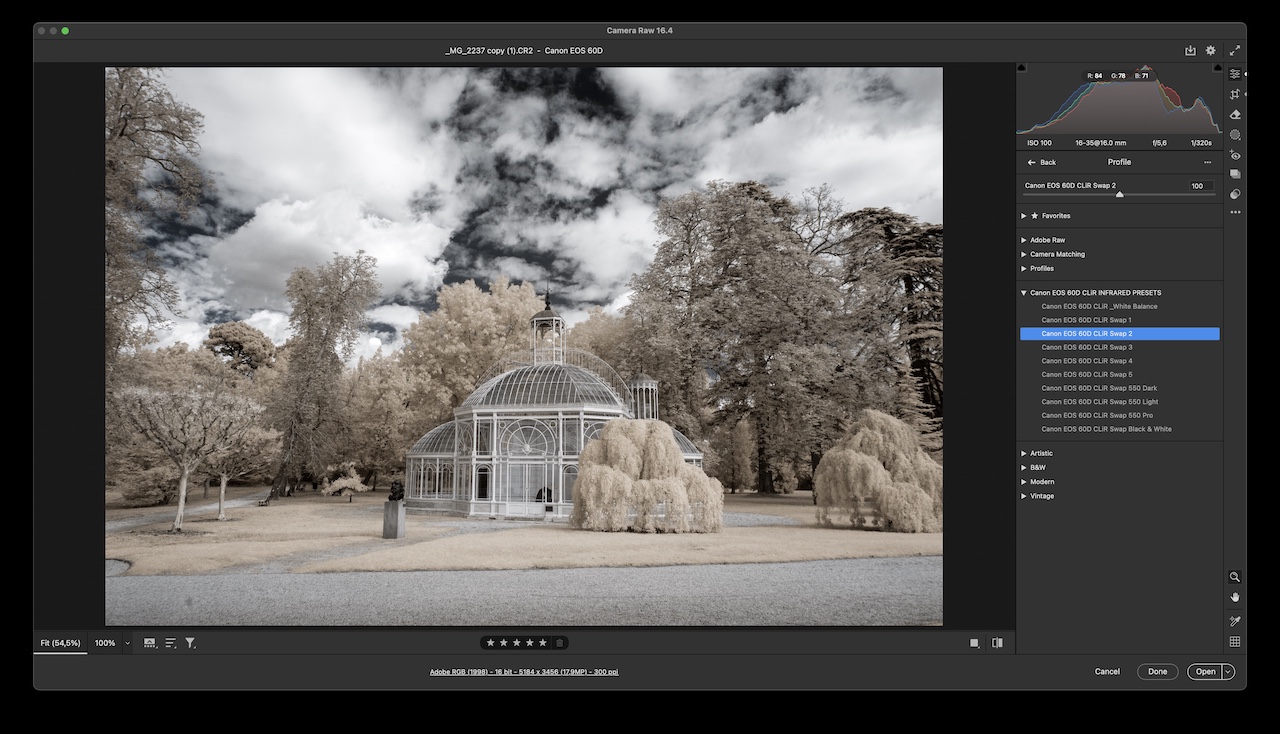
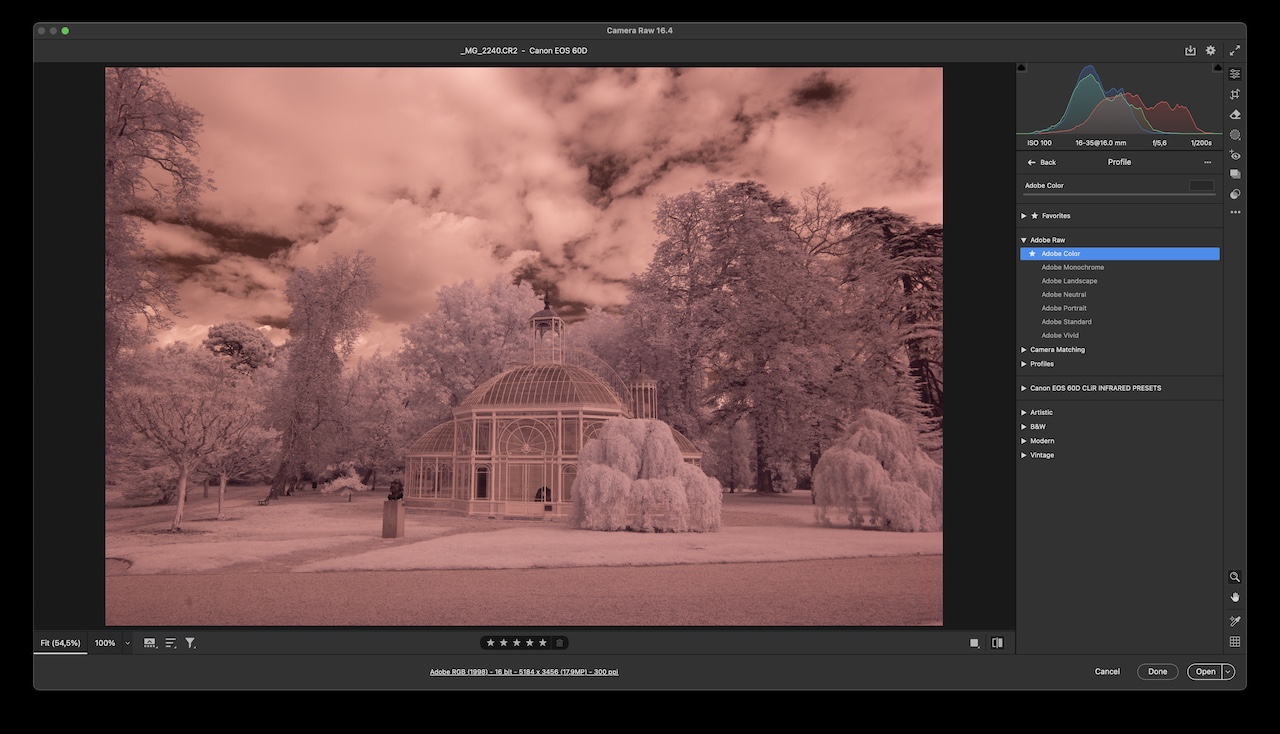
➊ Profile: Click the four-square icon to browse installed “dcp” profiles

➋ Click “Profiles“
Under the disclosed triangle, profile for Canon 60D is showing up.
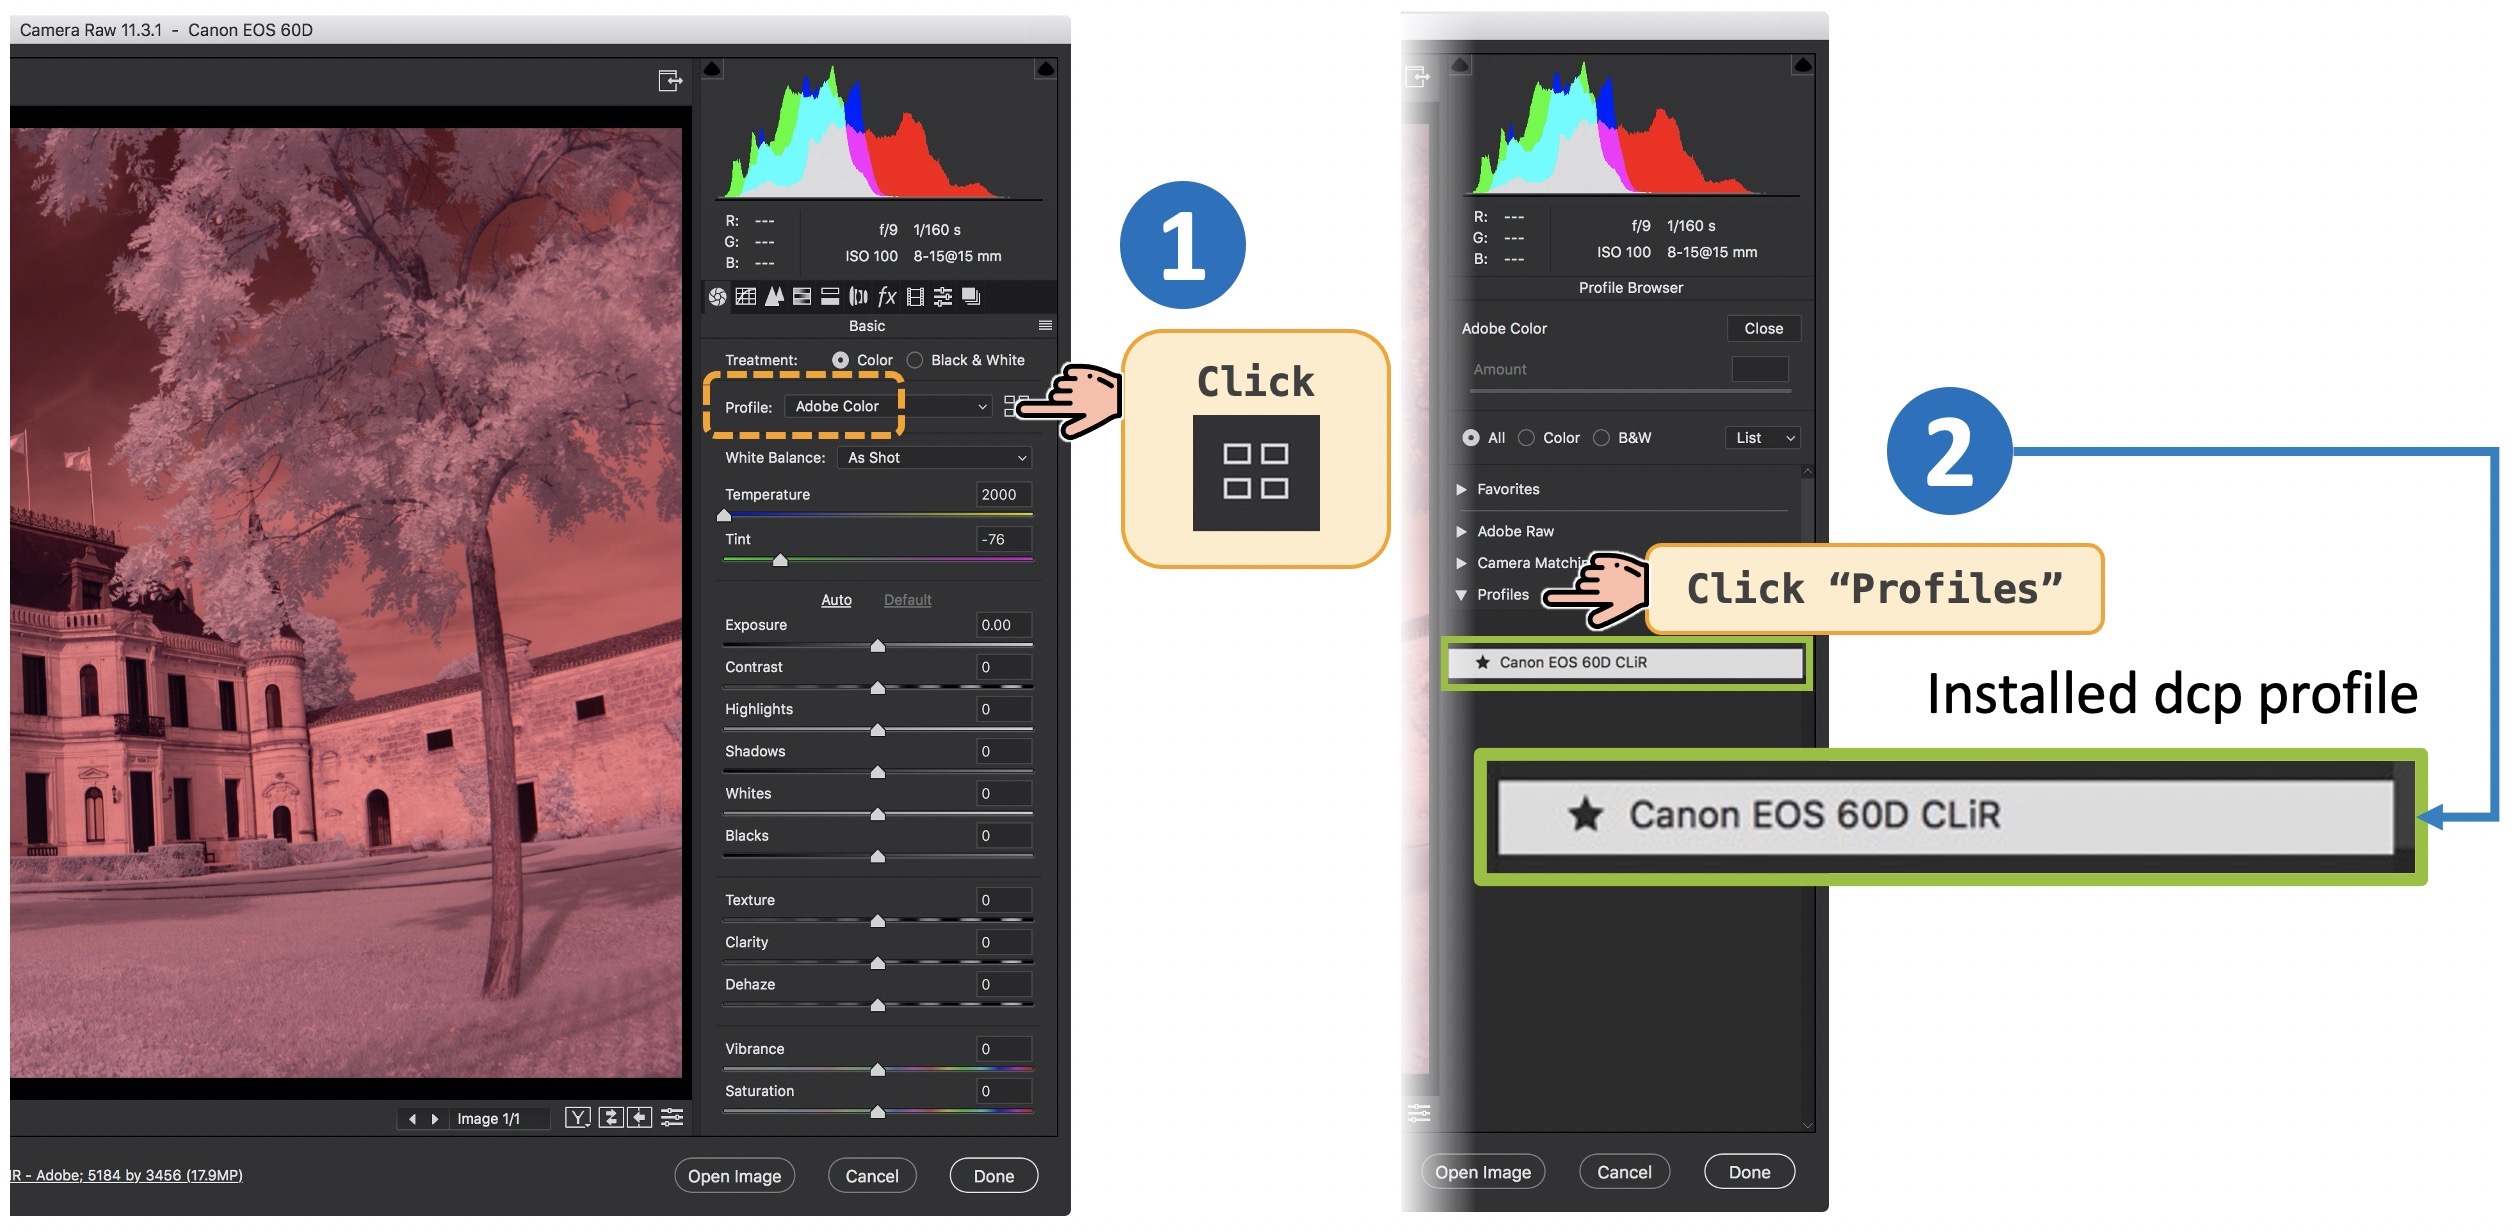
➌ Click “Canon EOS 60D CLiR” profile
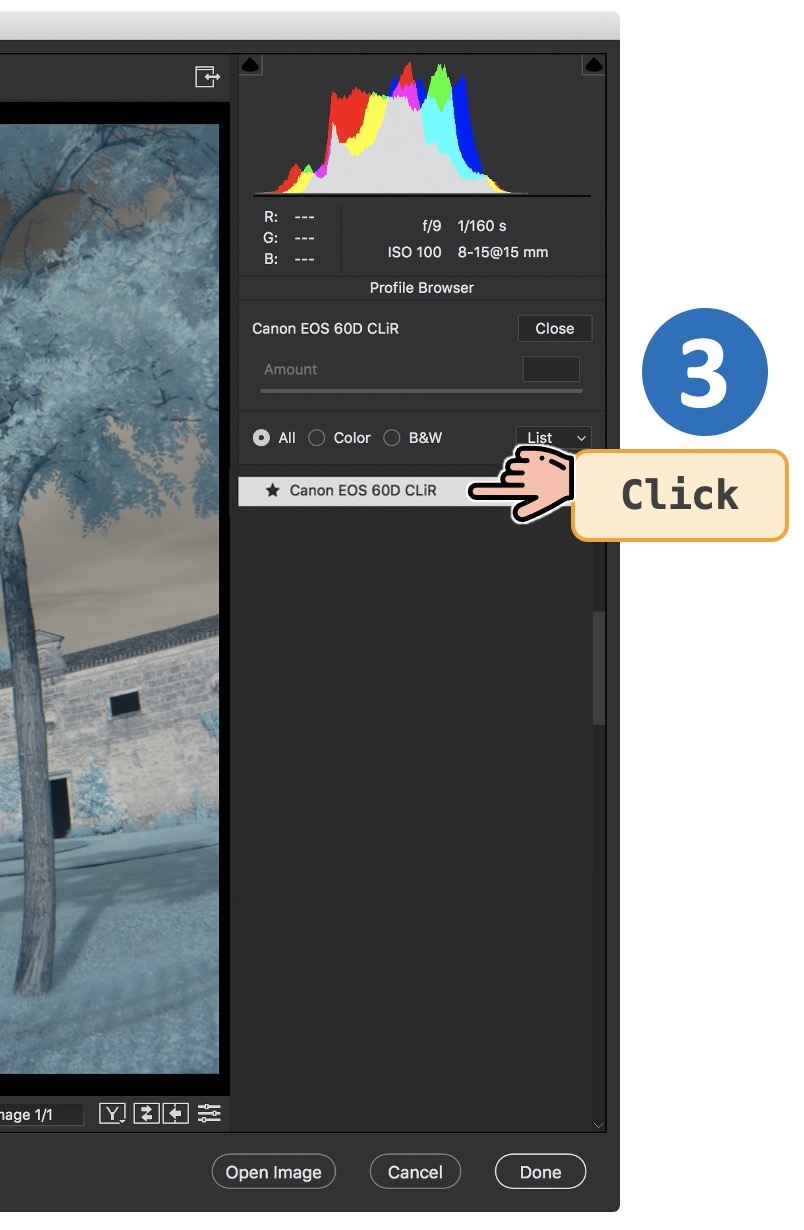
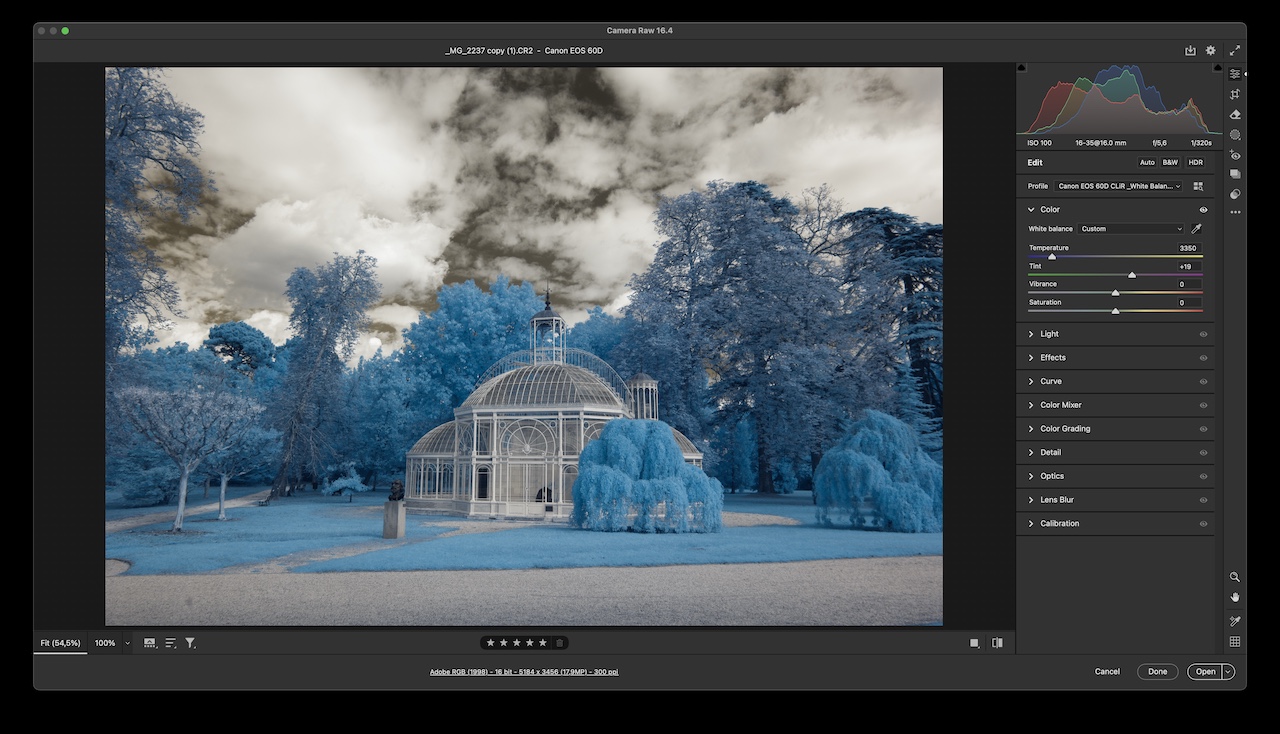
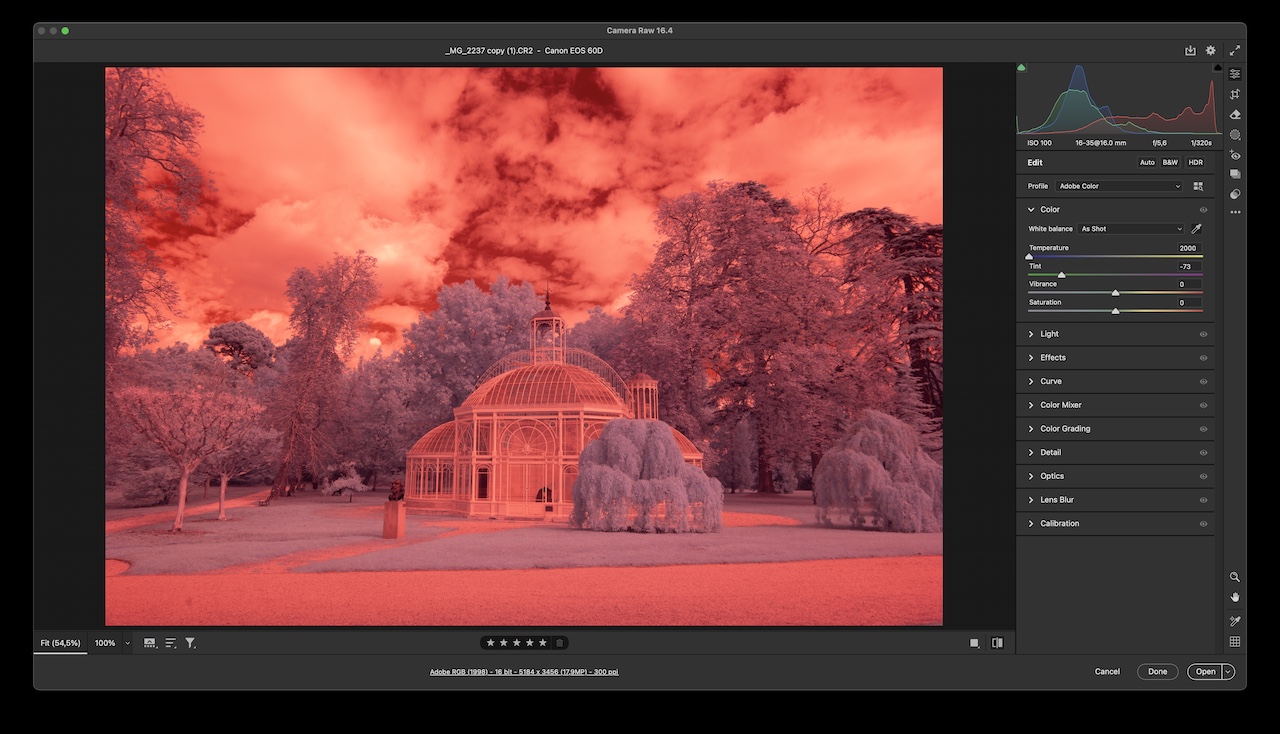
As you can see, CLiR profile has been applied, the image changed. Indeed, the profile “Canon EOS 60D CLiR.dcp” has been successfully installed.
This is looking good now because we have plenty of tones and colors to play with (as opposed to a red washed-out image…)
What to do now ?

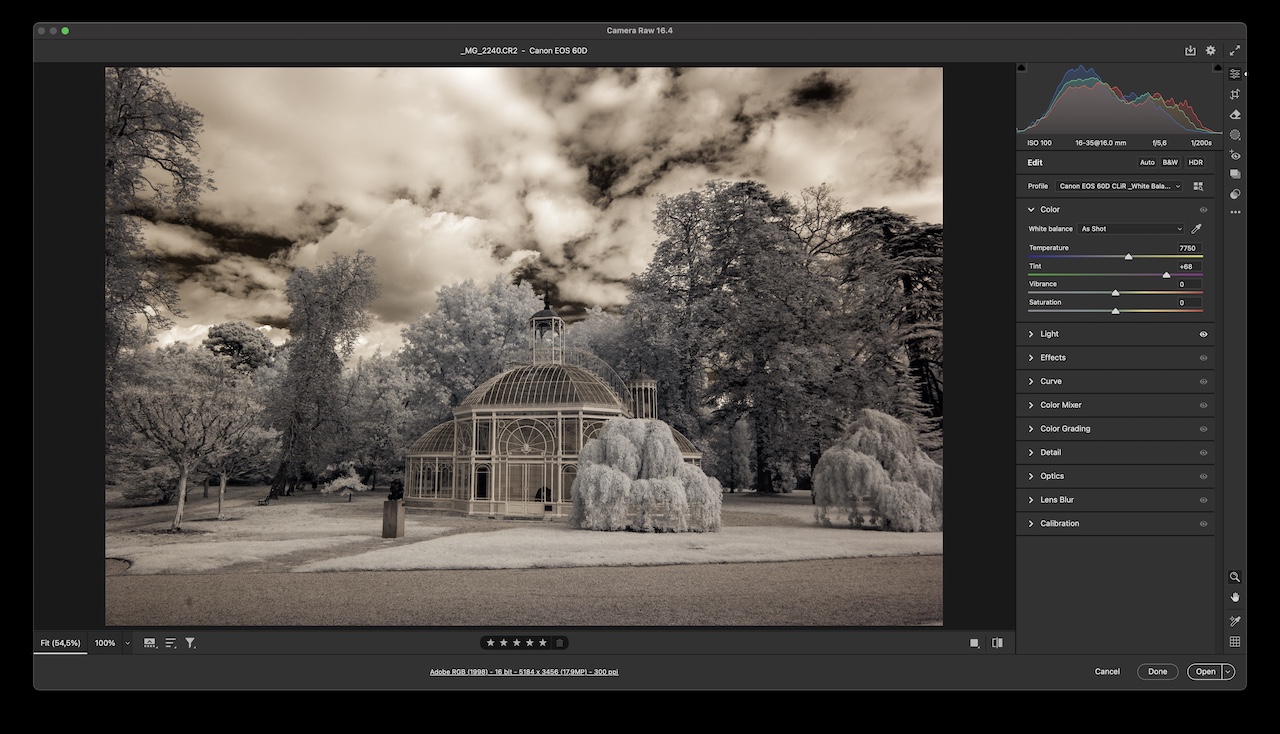
Now you can adjust White Balance using Temperature & Tint sliders.
Adjust them by hand first to see what each one is doing.
Although the dcp profile has been set properly to render iR White Balance, it is now up to you to adjust and optimize the Temperature + Tint sliders.
This is CRUCIAL to get maximum color separation, good diversity and less color cast.
Now, you are in control.
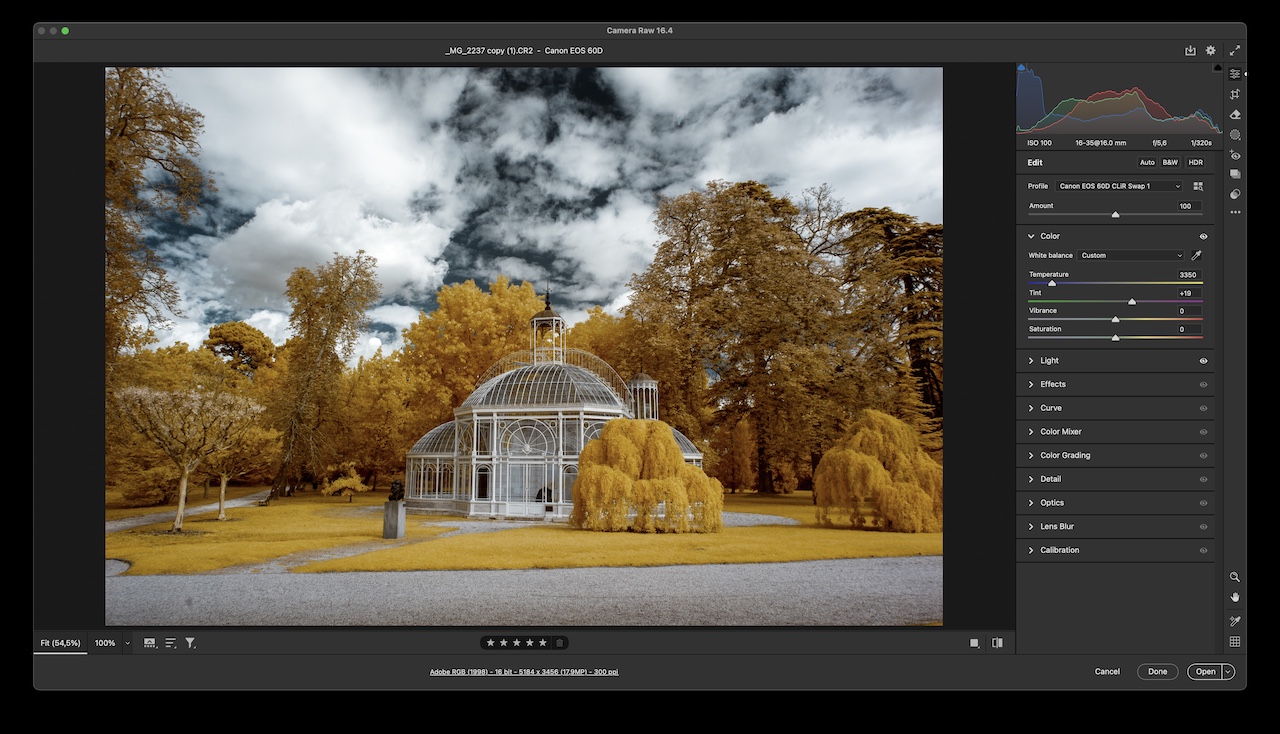
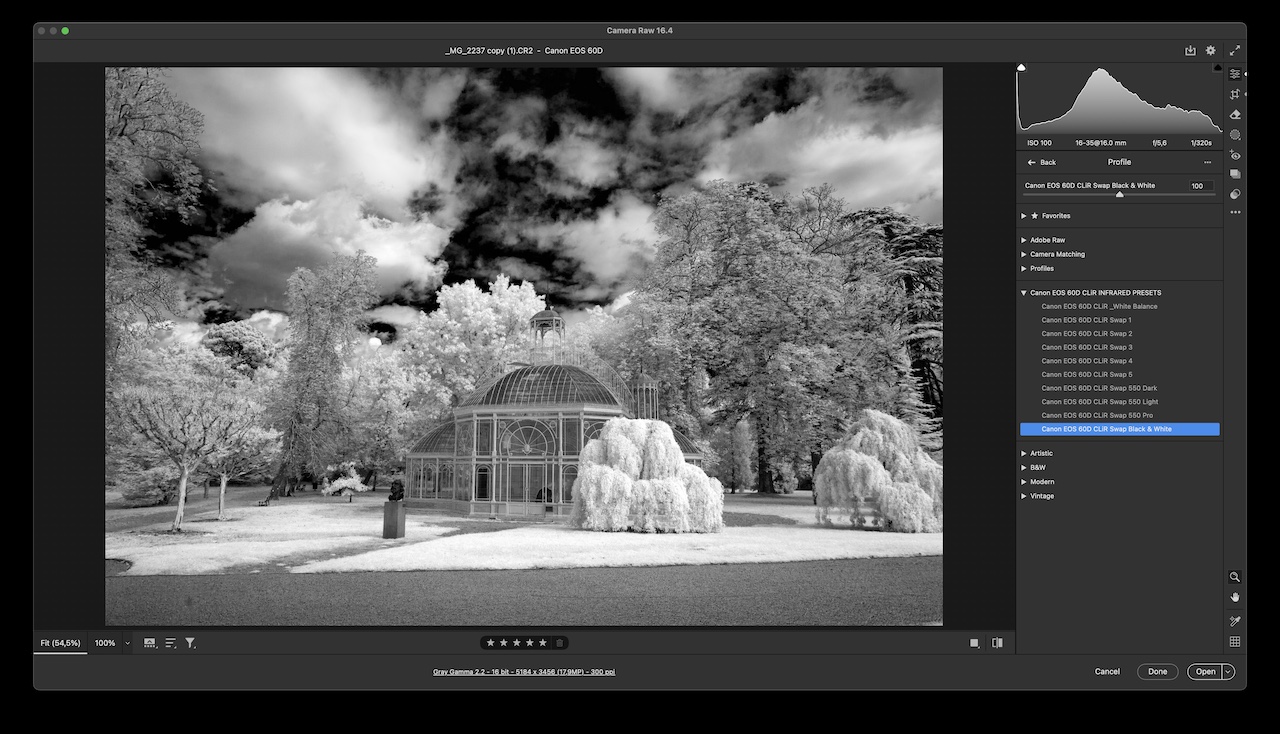
In the next article, I will show you how to unlock CLiR Raw workflow power. Now that we can control White Balance… wouldn’t it be awesome if we could apply a Red/Blue channel color swap ?
Well, it is awesome because it is possible ! Here are some previews :