In this article, I will show you how to import CLiR Advanced Presets into Camera Raw and LightRoom.
This is the second part of the previous article.
The second magic ingredient after CLiR Infrared dcp Profile.
CLiR Infrared Presets will allow you to swap channel colors in Lightroom/Camera Raw!

Where are CLiR Infrared Presets ?
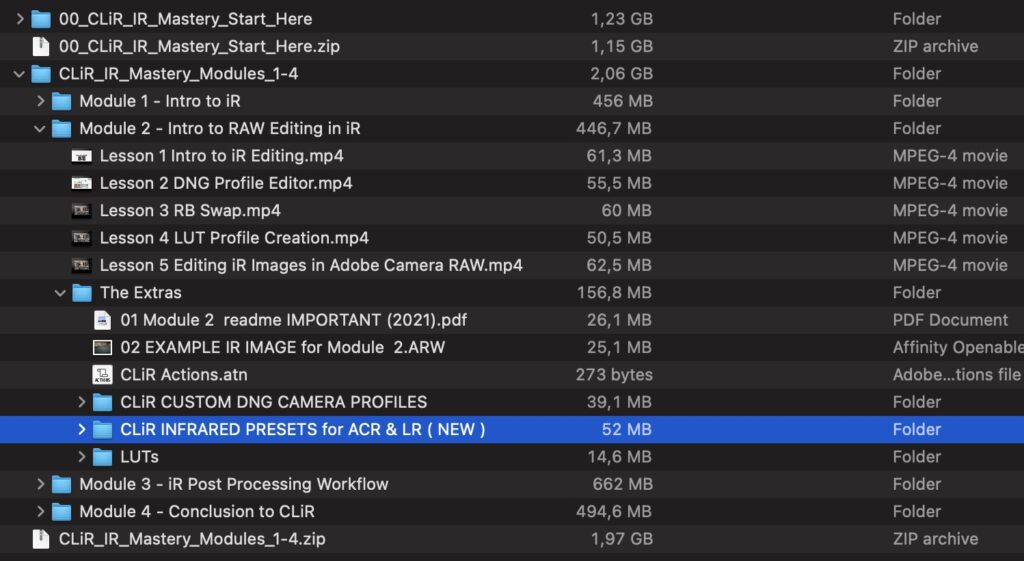
The CLiR advanced presets are in :
CLiR_IR_Mastery_Modules_1-4
 >> Module 2 - Intro to RAW Editing in iR
  >> The Extras
   >> CLiR INFRARED PRESETS for ACR & LR ( NEW )
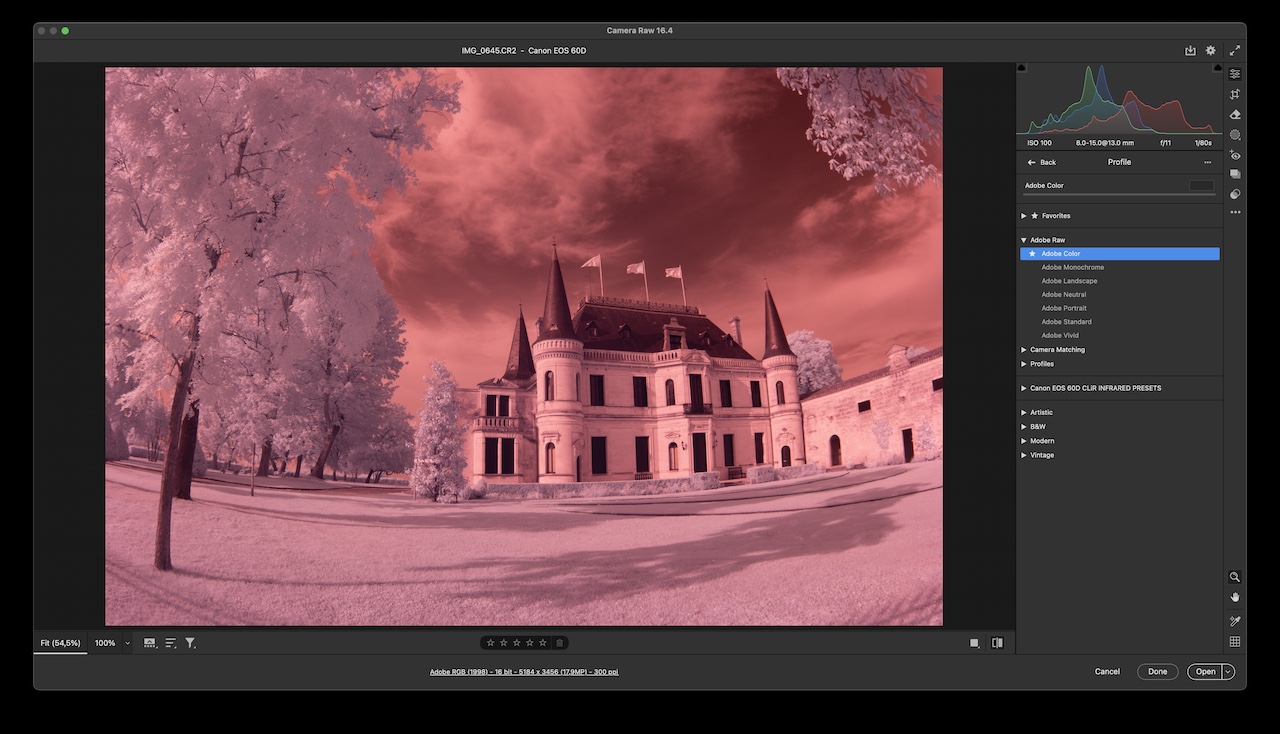
Step 1: open Raw file from your camera
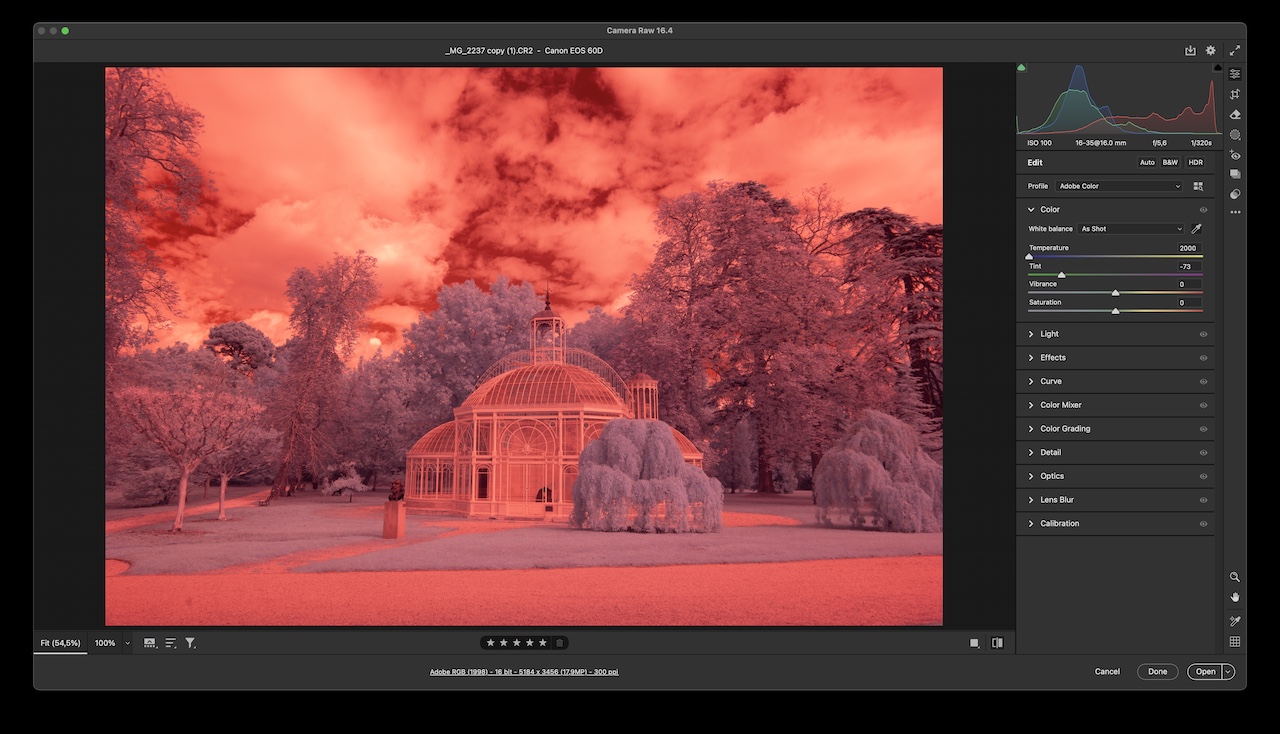
In this exemple I use a Canon 60D Shots taken with a 665nm filter in front of lens EF16.35mm f/4. I’m opening it with Photoshop, so I land in Camera Raw.
TIP : Alternatively, you could use Adobe Bridge to browse images and send them straight to Camera Raw, which is much quicker and convenient than going through Photoshop, in my opinion.
If you are a Lightroom user, click here
Note : installed “dcp” profiles and any presets will be automatically picked-up by Lightroom. This means you only need to install it once.
Prerequisites : for this to work, I’ve got to install the “dcp” profile for my Canon 60D as described in this article.
Step 2 : install CLiR Infrared Presets
Follow these steps:
Using Lightoom or Camera Raw, next to “Profile“ dropdown menu,
you should see “Adobe Color“, the default profile.

➊ Click on the “three-square-search” icon to browse the profiles:

➋ Click on the three dots [ … ]
➌ Select “Import Profiles & Presets” in the pop-up menu.
Browse to the .ZIP file that contains CLiR infrared presets. It has to be a ZIP file, don’t unZip it.
👍 Done !
Before Import
After Import
Lightroom users
- Go to the Develop module
- Go to the menu File > Import Develop Profiles and Presets
- Locate the .ZIP file that contains CLiR infrared profiles. It has to be a ZIP file, don’t unZip it.
- 👍 Done !
Note: Lightroom can import XMP presets, XMP profiles, DCP profiles, and LCP lens profiles.
They are generally contained in a zip file.
Optional : Manual installation of *.xmp format presets and creative profiles
In your user account, automatically imported profiles and presets are located in folder :
Camera Raw > Imported Settings
They are not stored with your Lightroom catalog.
⚠️ If you are using Lightroom Classic catalog on several machines, and therefore have “Store Presets with This Catalog” checked in “Preferences > Presets“, you will need to install the presets manually.
Here’s how to install CLiR Advanced Presets by hand:
- Unzip the preset file
- Go to the Lightroom “Preferences > Presets” tab

- Click the button “Show Lightroom Develop Presets”
Once Lightroom has opened a file dialog window:
- Drag or paste presets into the selected Settings folder
- Restart Lightroom
👍 Done !
Folder locations for Lightroom settings :
On Windows:
C:\Users\[your username]\AppData\Adobe\CameraRaw\Settings\
On Mac :
Macintosh HD/Library/Users/[my username]/Application Support/Adobe/CameraRaw/Settings
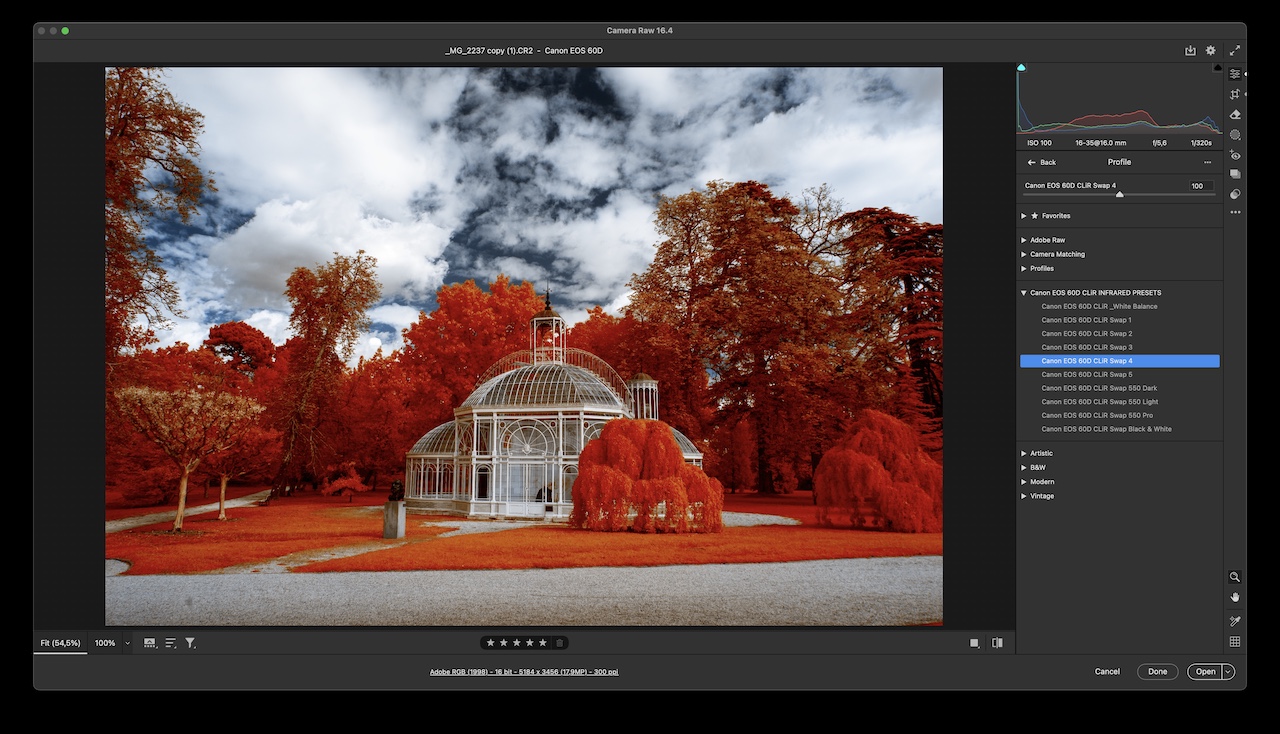
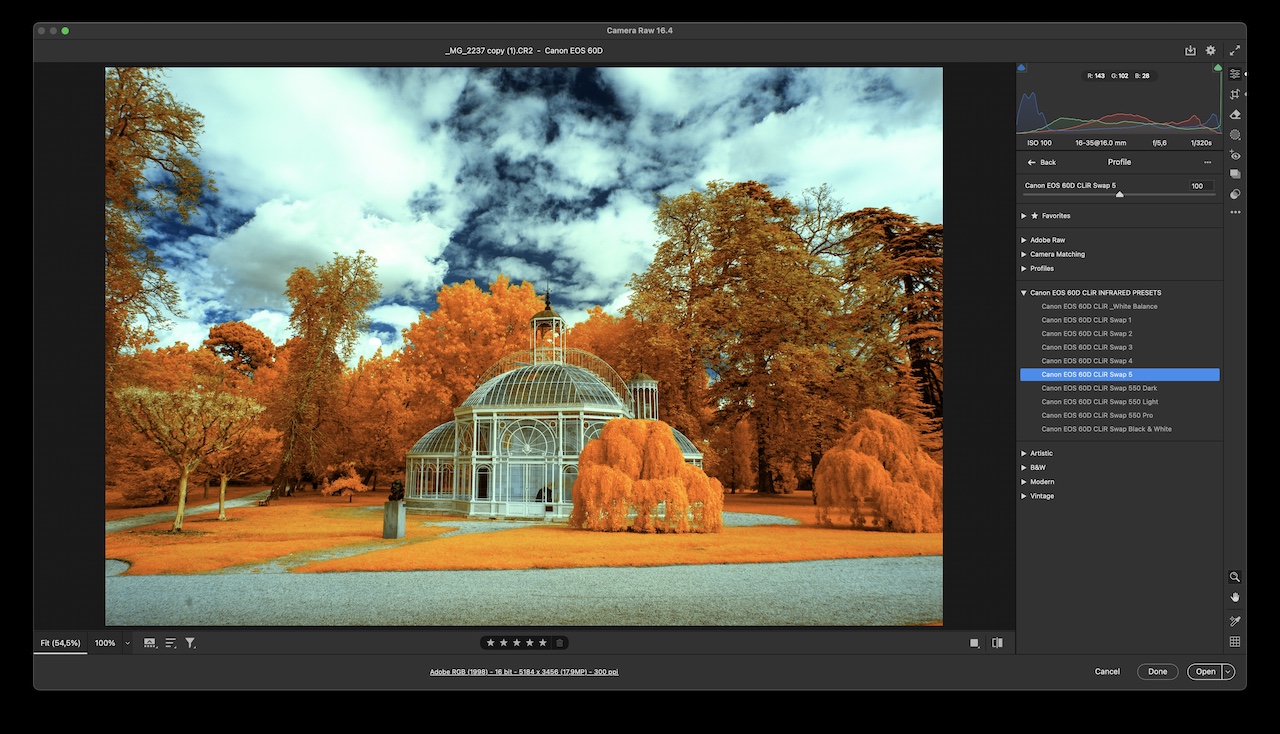
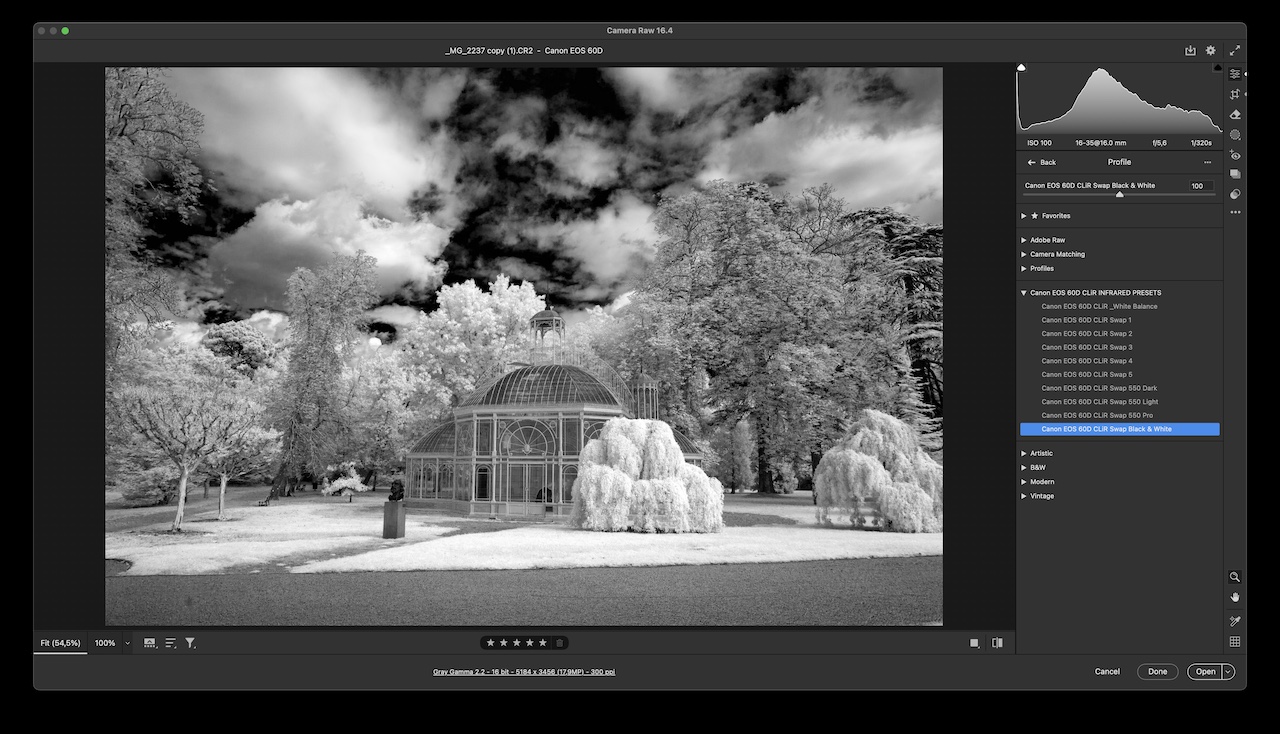
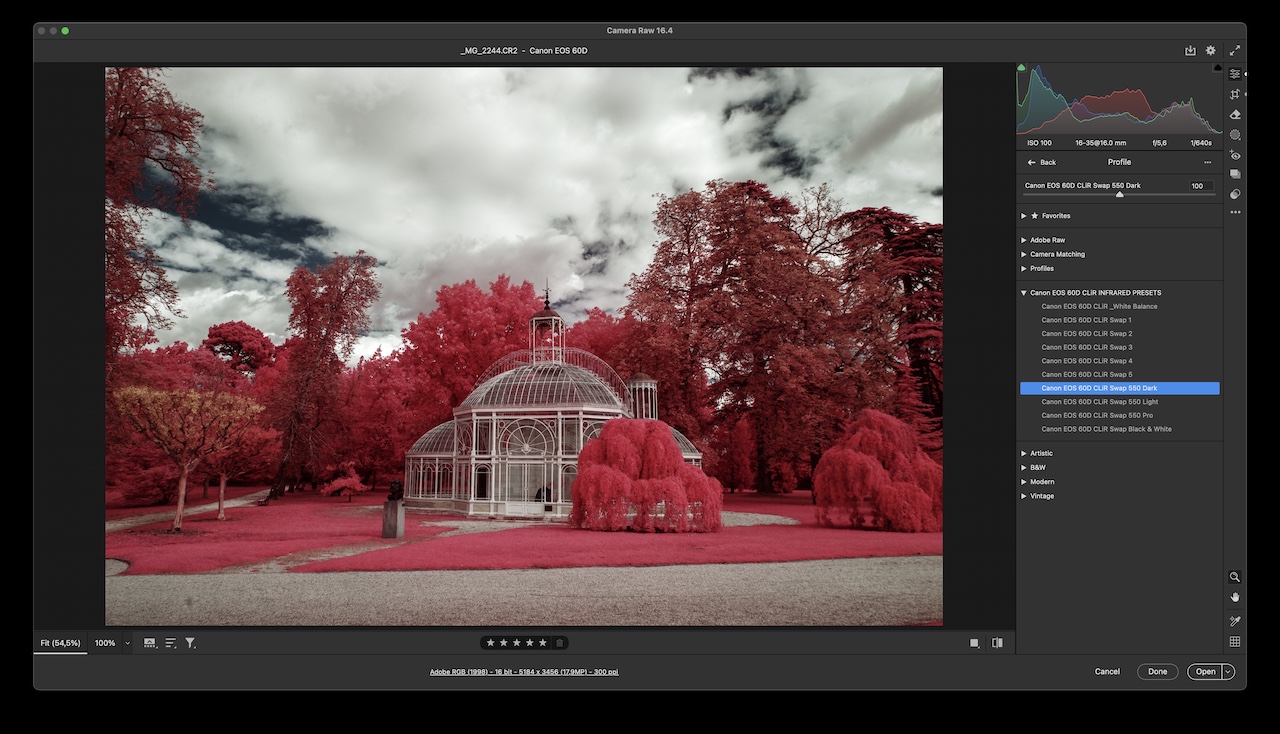
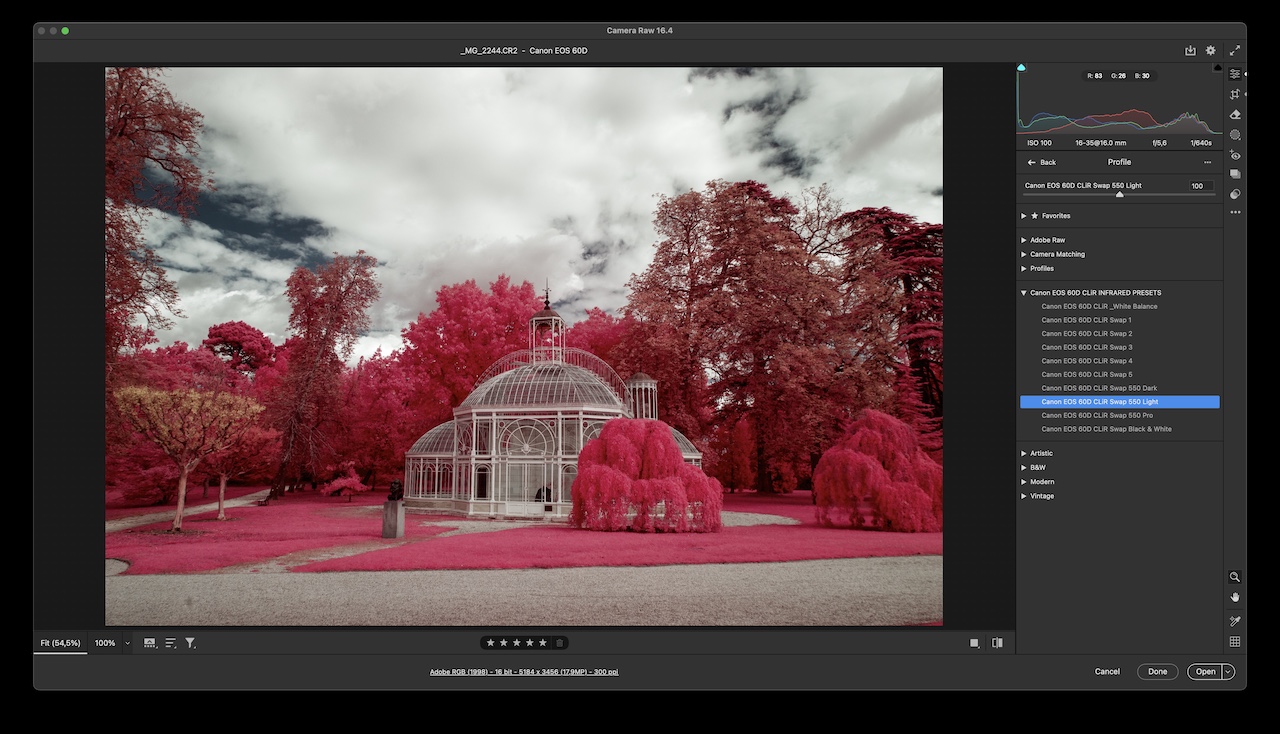
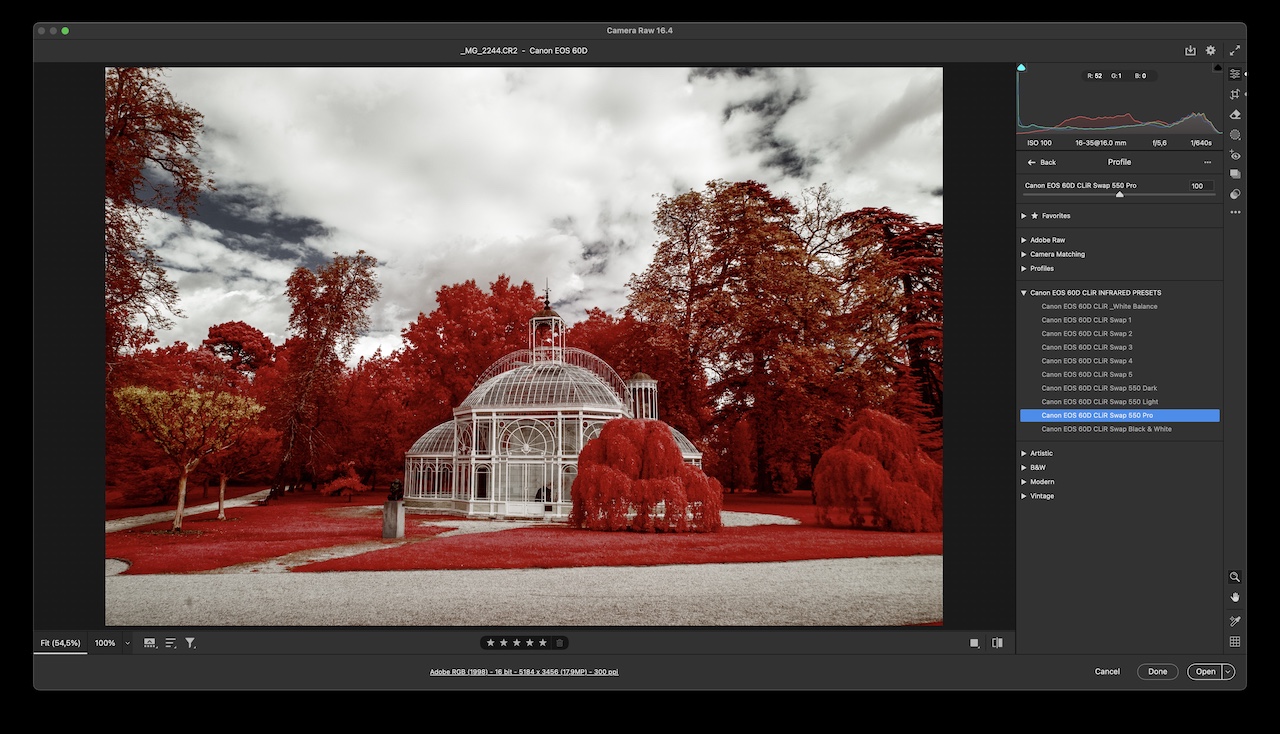
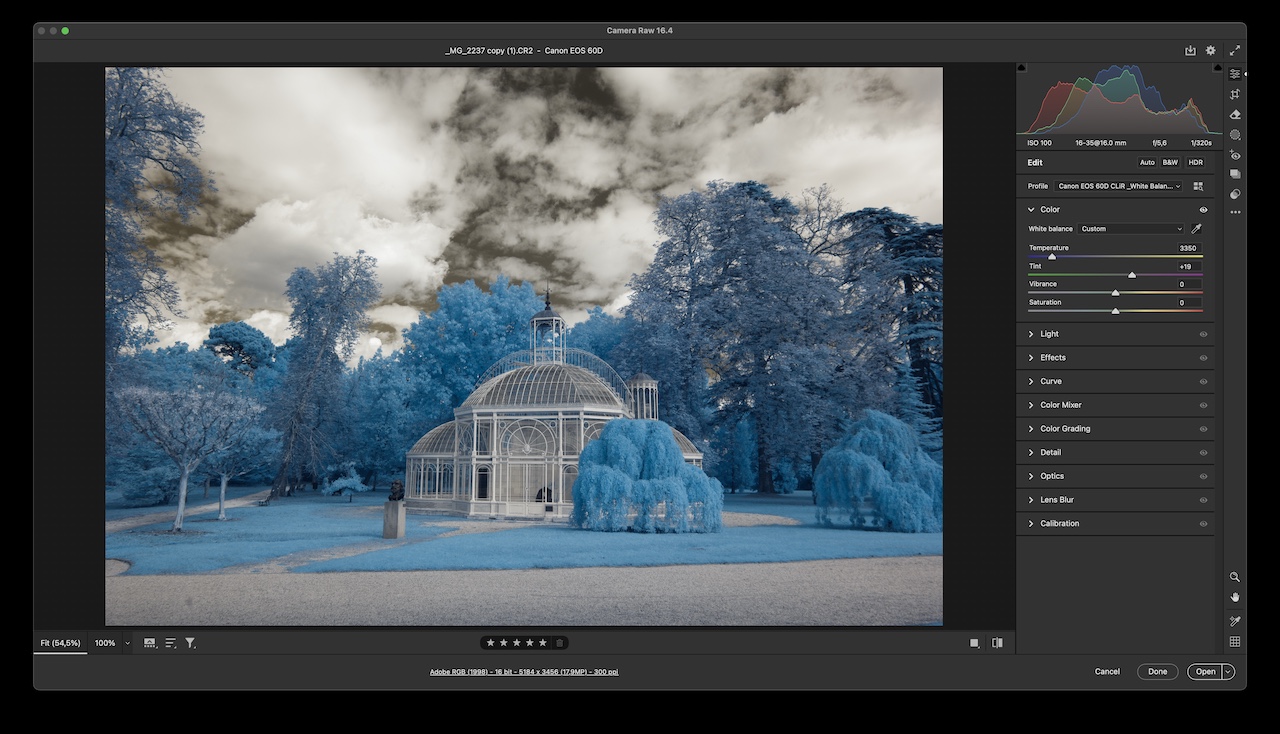
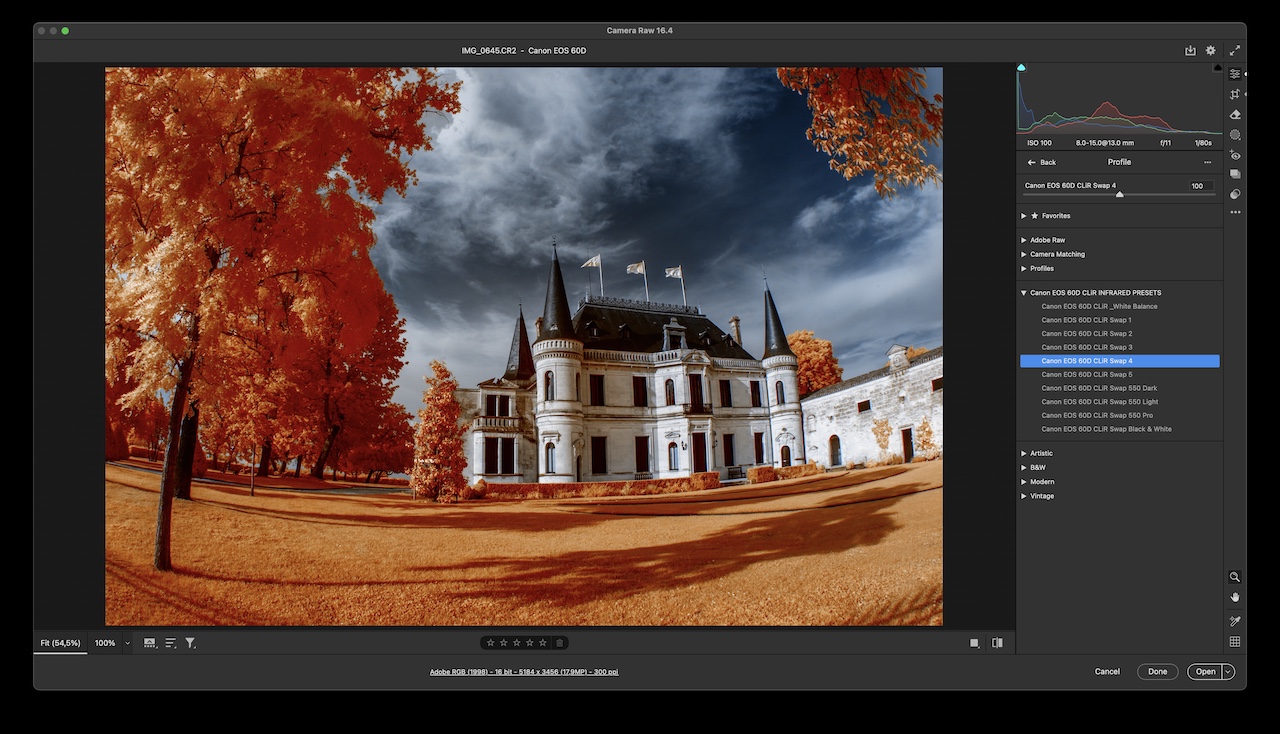
CLiR Infrared Raw Presets demo
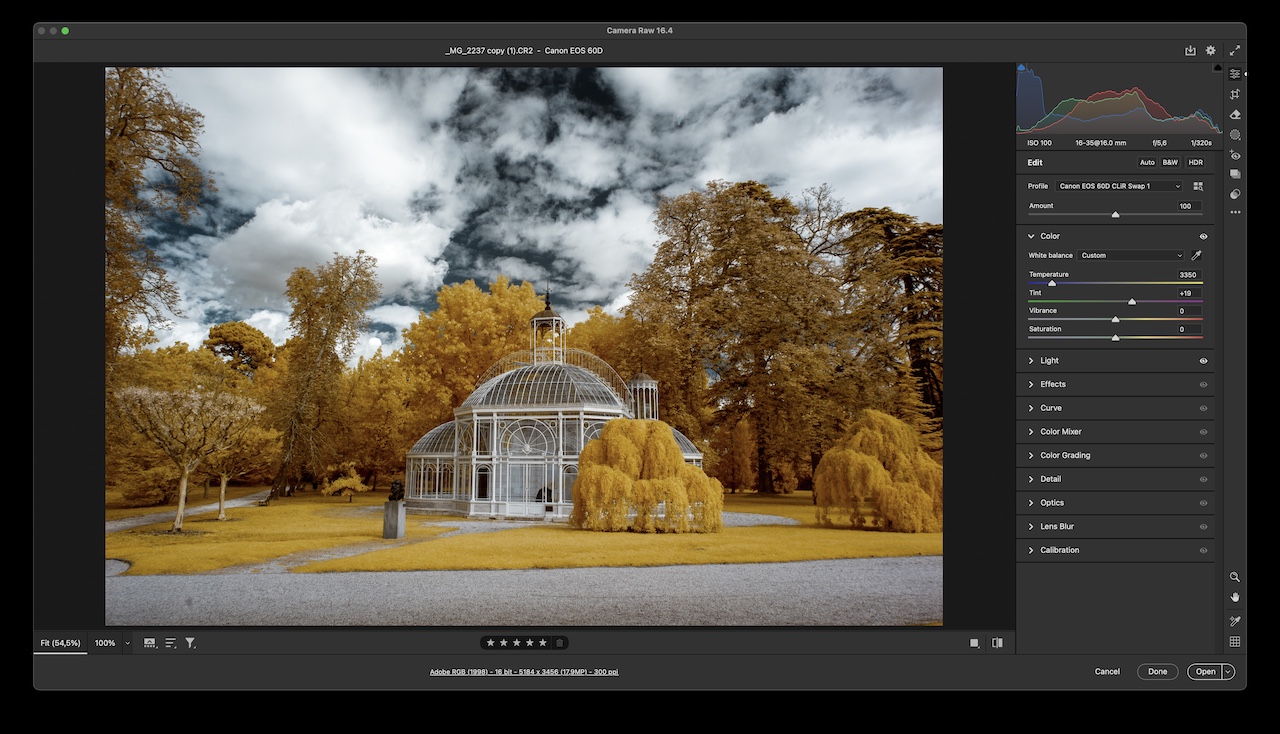
How sweet is that ! Going from a red washed-out image to a red leaves / blue sky infrared image, within a few clicks… and still in Raw format ! This is a glimpse into CLiR Infrared Raw Workflow.
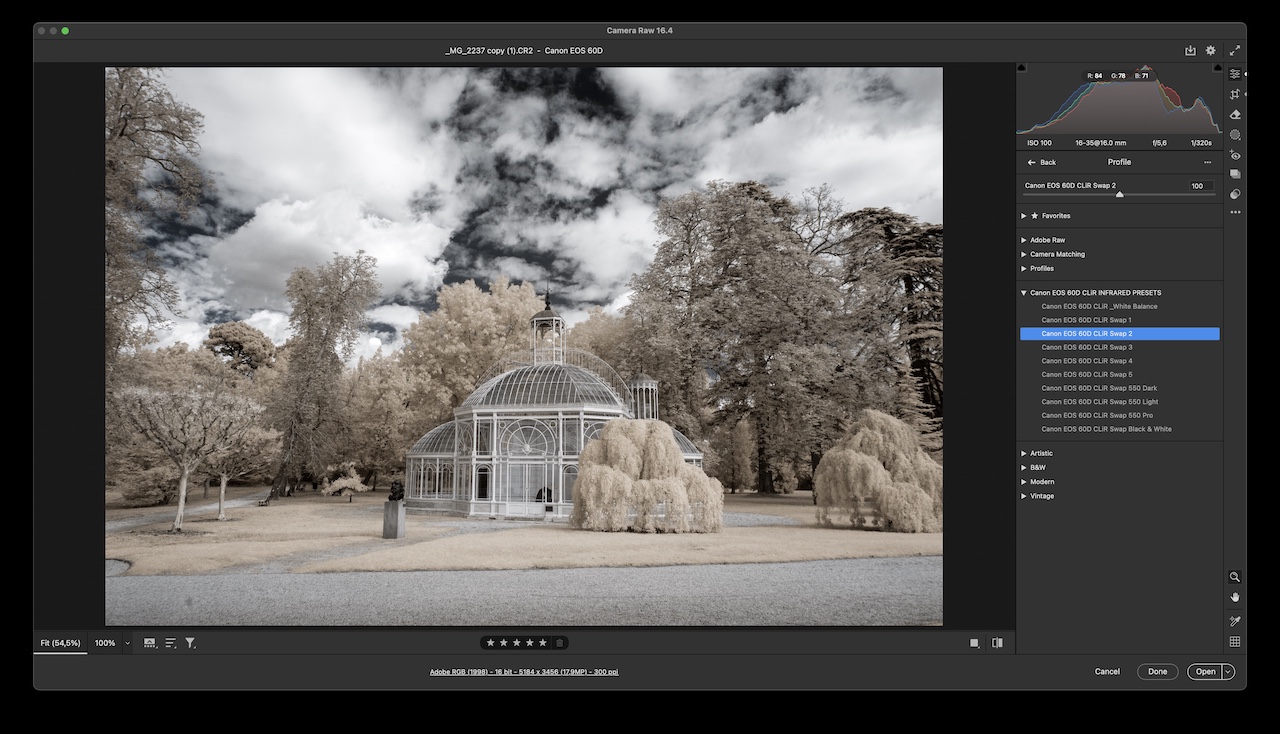
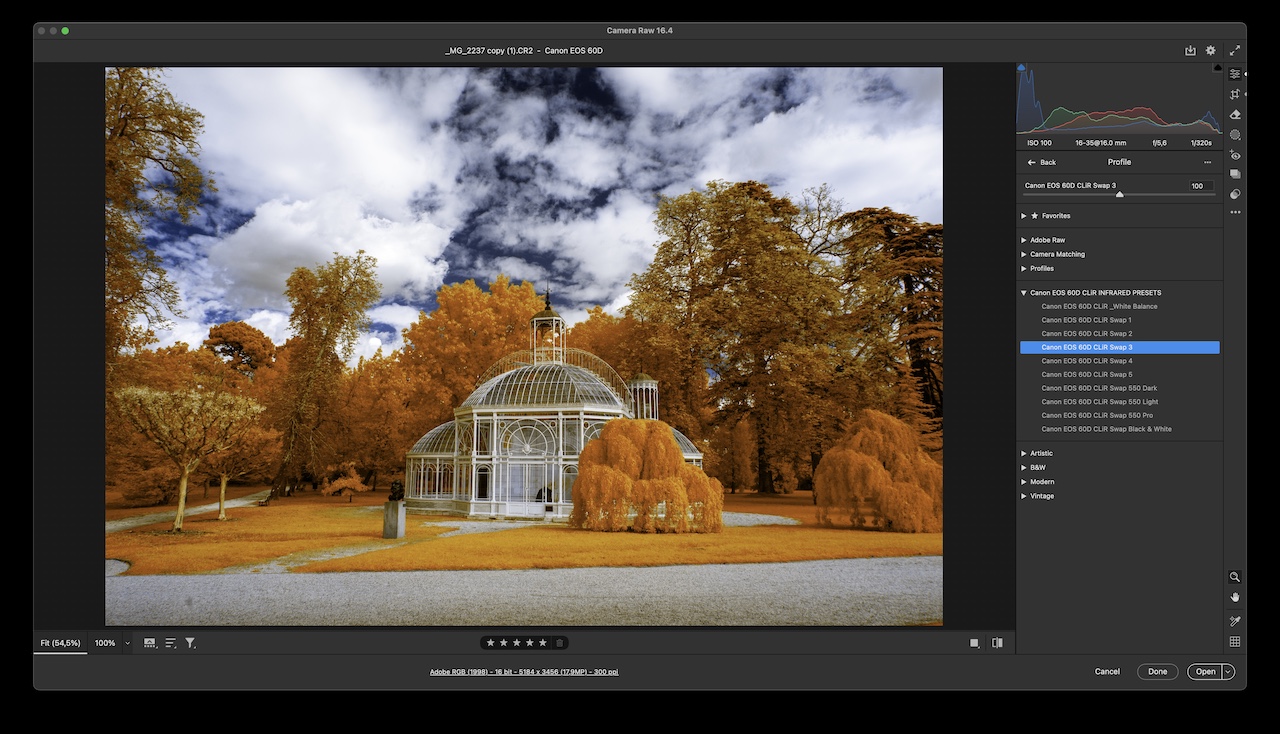
The below shows CLiR Infrared Presets. At least 10 editing starting points in a couple of clicks.